Eureka! (Part I)
(I've got lots of photos, and a fair bit of discussion, so I'm splitting this into multiple entries. Patience, and all.)
A Better Method for No-Sew Mitered Squares: Domino Knitting
Note -- Attaching mitered squares in this manner is not shown in Vivian Høxbro's Domino Knitting, but she does discuss the concept of joining knitted pieces using this method (and several others) in some detail. If you are at all interested in basic methods of the no-sew joining of one piece of knitting to another, I highly recommend this book.
Square 1:
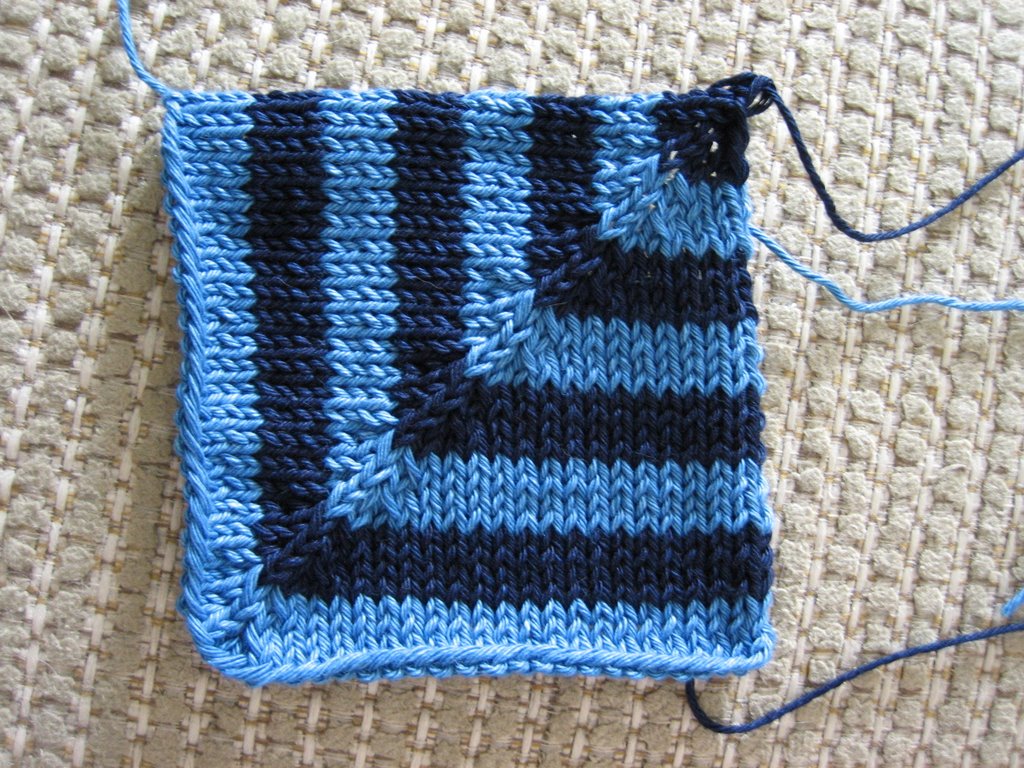
Behold! The simple mitered square of the Psychedelic Squares Afghan and, more recently, of Mason-Dixon Knitting:

With a couple of minor modifications. (Perhaps not strictly necessary, but I have my reasons for each. You can choose to use them. Or not.)
First modification -- I use the long-tail cast on. Why? Because I like it.
Second modification -- Instead of casting on 48 stitches (I like the smaller version of the mitered square), I cast on 50. This adds two more stitches, one to each edge, as a selvedge. This would not be useful, except for that row close to the end where you are decreasing from 6 stitches to 3. I find it annoying to join (even by sewing, really) the squares at this row with the decreases right on the edge.
I maintain the additional edge stitches right to the end. When I get down to three stitches (the two edge stitches, plus the last "body" stitch), I don't decrease further. I just thread my yarn tail through the last three stitches.
Square 2:
Cast on 49 stitches (or one stitch less than you cast on for your first square).
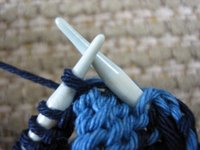
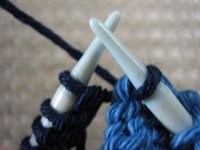
 Insert your second needle into the first edge stitch of your first square.
 Insert your first needle (the one with the 49 stitches) into that same edge stitch, as if to purl.
 Purl.
Purl.
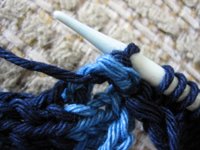
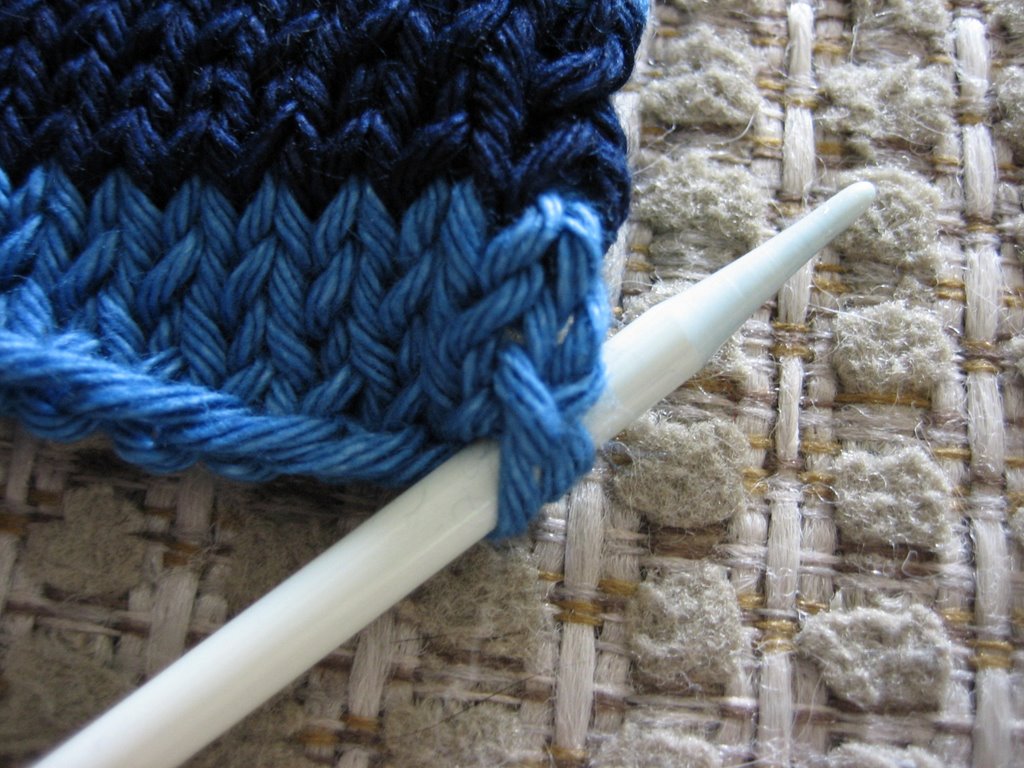
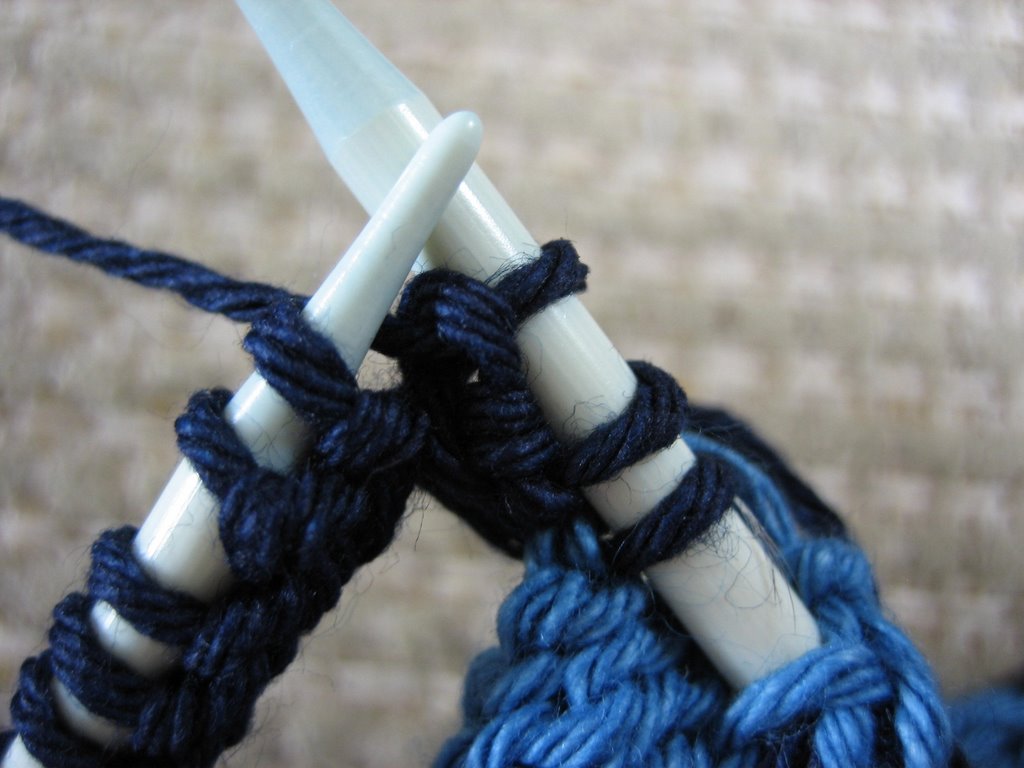
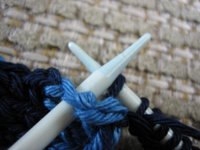 Before you turn, take your newly freed needle and insert it back into your first square, two rows up from where it was before. (I couldn't get a good photo of this. The best explanation I can give is to find where that last purl stitch is, then insert your needle between the first and second stitches, two horizontal bars up.)
The placement of this needle is important, as it determines whether or not your rows and stripes will line up from one square to another.
If you don't get it right the first (or fourth) time, don't despair. Trial and error, and all. (Don't even want to admit how many times I tried this before I got it right.)
 Turn.
Turn.
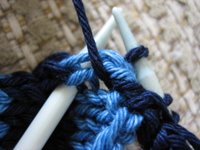
 Slip the first stitch, with the yarn in back.
Keeping the yarn in back is key. This took me more than a little while a while to figure out. Høxbro doesn't spell this out. That was very frustrating. Although perhaps it is supposed to be implied in her direction to "Slip knitwise." Whatever.
Also key is to tighten up this slipped stitch. Make sure to take up all the slack yarn between the first square and the last stitch on the second square. A loose join is ugly. (I know whereof I speak.)
 Purl to end.
Turn.
 Knit as you normally would a mitered square (keeping in mind that you have an extra stitch, so you need to add one to the total number of stitches before you begin decreasing), until you get to the last stitch.
 Purl the last stitch together with the edge stitch from square 1.
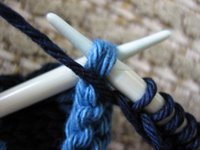
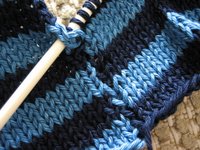
 Insert your needle another two rows up. (This may be a better picture, as you can actually see those two horizonal bars -- although I guess they're closer to vertical in the photo, the way the knitting is oriented -- between the purl stitch and where the needle goes in.)
 Continue as described, changing colors where you wish.
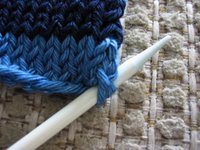
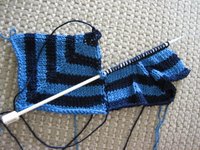
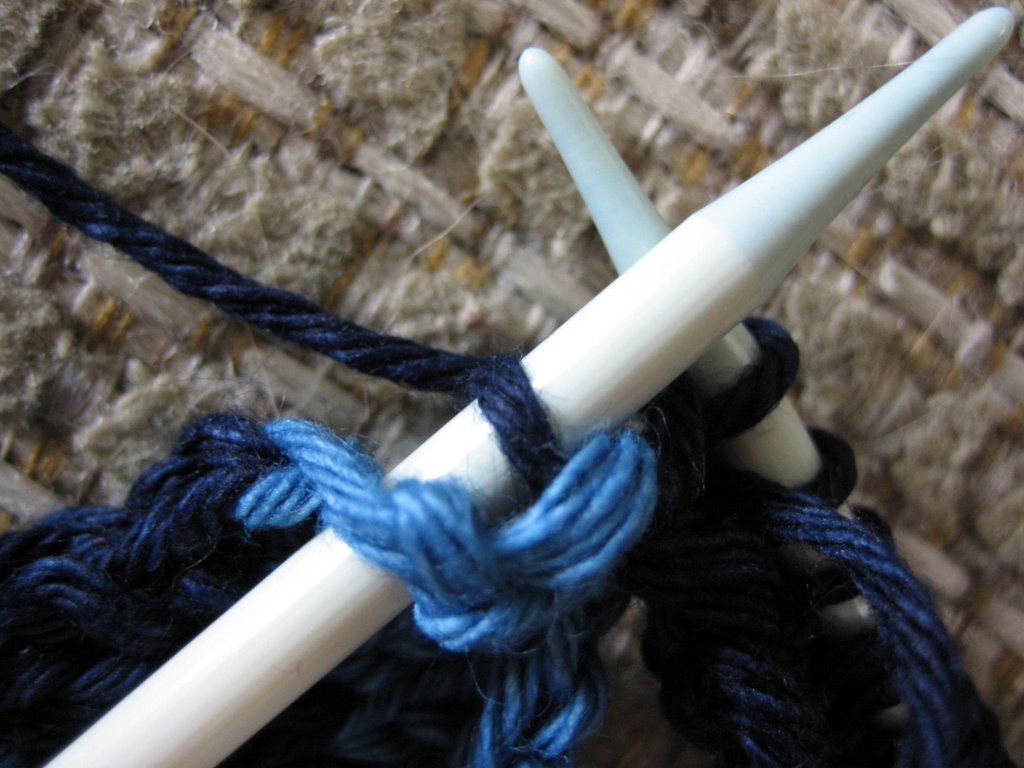
 Close-up of the join. Perhaps not quite as neat as mattress stitch, but pretty darn close. And with a little practice . . .

(To be continued . . .)
A Better Method for No-Sew Mitered Squares: Domino Knitting
Note -- Attaching mitered squares in this manner is not shown in Vivian Høxbro's Domino Knitting, but she does discuss the concept of joining knitted pieces using this method (and several others) in some detail. If you are at all interested in basic methods of the no-sew joining of one piece of knitting to another, I highly recommend this book.
Square 1:
Behold! The simple mitered square of the Psychedelic Squares Afghan and, more recently, of Mason-Dixon Knitting:
With a couple of minor modifications. (Perhaps not strictly necessary, but I have my reasons for each. You can choose to use them. Or not.)
First modification -- I use the long-tail cast on. Why? Because I like it.
Second modification -- Instead of casting on 48 stitches (I like the smaller version of the mitered square), I cast on 50. This adds two more stitches, one to each edge, as a selvedge. This would not be useful, except for that row close to the end where you are decreasing from 6 stitches to 3. I find it annoying to join (even by sewing, really) the squares at this row with the decreases right on the edge.
I maintain the additional edge stitches right to the end. When I get down to three stitches (the two edge stitches, plus the last "body" stitch), I don't decrease further. I just thread my yarn tail through the last three stitches.
Square 2:
Cast on 49 stitches (or one stitch less than you cast on for your first square).
 Insert your second needle into the first edge stitch of your first square.
 Insert your first needle (the one with the 49 stitches) into that same edge stitch, as if to purl.
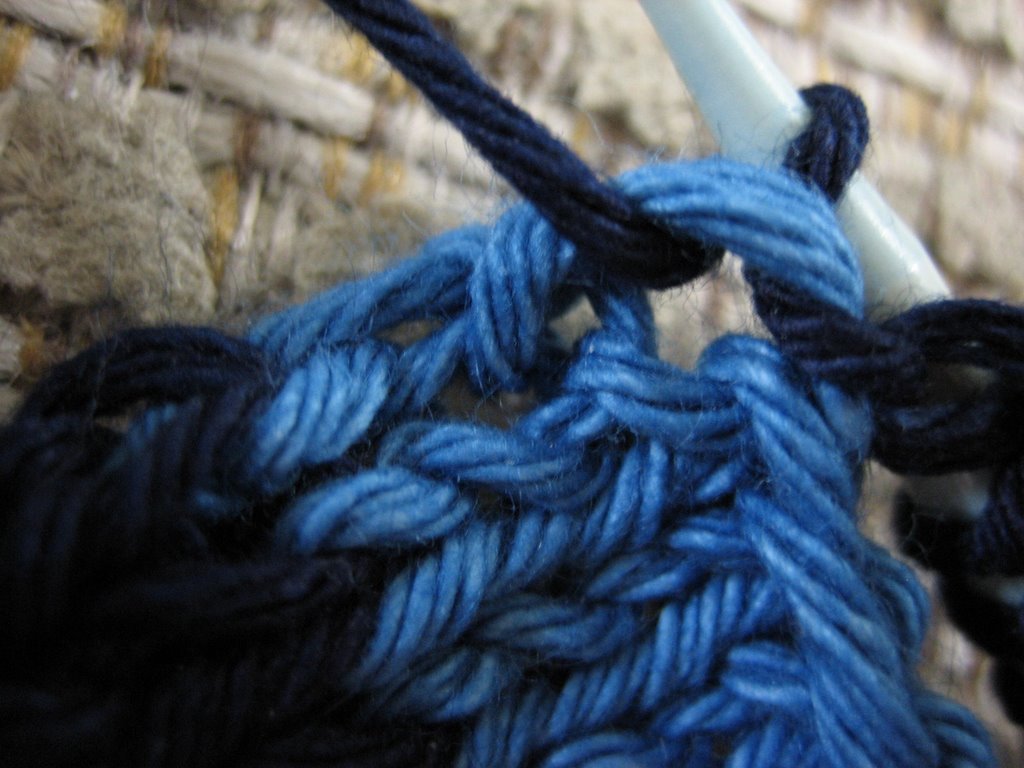 Purl.
Purl. Before you turn, take your newly freed needle and insert it back into your first square, two rows up from where it was before. (I couldn't get a good photo of this. The best explanation I can give is to find where that last purl stitch is, then insert your needle between the first and second stitches, two horizontal bars up.)
 The placement of this needle is important, as it determines whether or not your rows and stripes will line up from one square to another.
If you don't get it right the first (or fourth) time, don't despair. Trial and error, and all. (Don't even want to admit how many times I tried this before I got it right.)
 Turn.
Turn. Slip the first stitch, with the yarn in back.
 Keeping the yarn in back is key. This took me more than a little while a while to figure out. Høxbro doesn't spell this out. That was very frustrating. Although perhaps it is supposed to be implied in her direction to "Slip knitwise." Whatever.
Also key is to tighten up this slipped stitch. Make sure to take up all the slack yarn between the first square and the last stitch on the second square. A loose join is ugly. (I know whereof I speak.)
 Purl to end.
Turn.
 Knit as you normally would a mitered square (keeping in mind that you have an extra stitch, so you need to add one to the total number of stitches before you begin decreasing), until you get to the last stitch.
 Purl the last stitch together with the edge stitch from square 1.
 Insert your needle another two rows up. (This may be a better picture, as you can actually see those two horizonal bars -- although I guess they're closer to vertical in the photo, the way the knitting is oriented -- between the purl stitch and where the needle goes in.)
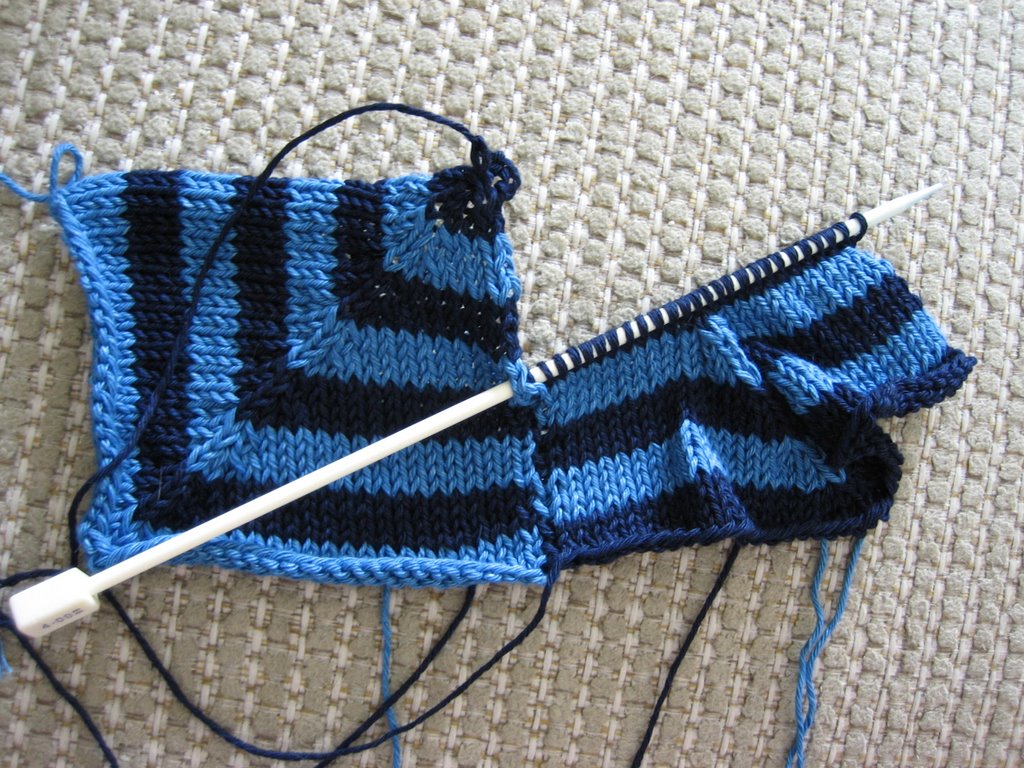 Continue as described, changing colors where you wish. Close-up of the join. Perhaps not quite as neat as mattress stitch, but pretty darn close. And with a little practice . . .
(To be continued . . .)
Labels: Tips / Tutorials / Experiments
posted by Anonyknits at Saturday, July 29, 2006
![]()

3 Comments:
You're a genious! Can't wait to try it!
Ang
Mitred Square Pot holders? What is this? Someone share please!
Ang
I am doing my Noro Kureyon Mitered Square blanket, and sewing up seams has been my nemesis in the past.. I have two incomplete afghans rotting in my closet due to my loathe of seams! I am so happy I could faint... its magic, simply magic!!! You are a GENIUS. I will post pics of my first join on my blog! Thanks again and again and again!!
Post a Comment
<< Home